Print Using Lindy Large Format Printer
 | |
|---|---|
 | |
| Summary | How to print posters and large format photos |
| Author | Maintained by Matt Ringh |
| Help | Get help with this article |
| Status | in need of review. |
Large Format Printing
This page will help you successfully print to the large format HP DesignJet Z9+ Printer in the Lindy Lab, including how to add the printer.
How do I install this printer
If you have a Mac laptop, this printer can be installed through the Self Service App.
Print Settings
Note: The following directions assume that you are printing the PDF in the application Preview.
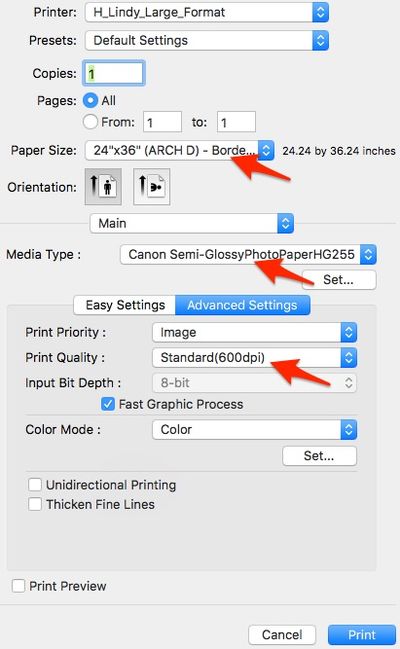
Once you've selected the printer "H_Lindy_Large_Format", match the settings below to print full page posters.
Preview (Settings to change)
Paper Size: 24”x36” (ARCH D) – Borderless
Scale Mode: Scale to Fit
Scale to Fit Mode: Print entire image
Main (Settings to change)
Media Type: Canon Semi-GlossyPhotoPaperHG255
Print Quality: High(600dpi)

Releasing the print
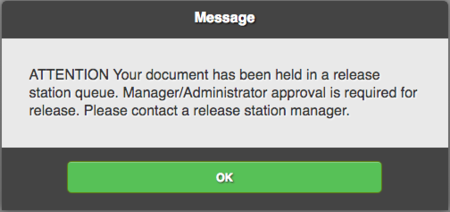
Once you've printed, there will be a bit of a delay while the print "spools". Once this has spooling is finished you may see a message like this:
 or
or 
You must release the print job via PaperCut, our networked print spooler. This prevents waste of such expensive resources.
Any Science, Art Department, and Technology Department faculty members can release a print job to the large format printer.
How to Release (For Science and Art Department Faculty, and members of theTech Department)
To go straight to the Lindy Large Format printer
- Remember, only Science and Art Department Faculty, and members of theTech Department can release prints.
Print vs Override
Override gives you the option to "charge" a particular department.
