Care for LS Device: Difference between revisions
Mvanmierlo (talk | contribs) No edit summary |
|||
| Line 1: | Line 1: | ||
{{ | {{AboxNew | ||
| name = Care for LS Devices | |||
| learning = | |||
| instruction = | |||
| community = x | |||
| summ = Tips on troubleshooting and caring for your child's LS issued device | |||
| maintained = SC | |||
| year = 2023-2024 | |||
}} | }} | ||
__TOC__ | |||
==Best Practices for Using an RCS Device== | ==Best Practices for Using an RCS Device== | ||
Revision as of 16:08, 15 June 2023
 | |
|---|---|
 | |
| Summary | Tips on troubleshooting and caring for your child's LS issued device |
| Author | Maintained by Sammy Castro |
| Help | Get help with this article |
| Status | in need of review. |
Best Practices for Using an RCS Device
Below are some best practices and points to consider when using your RCS issued device at home:
Best Practices
Use some of the tips below to ensure your devices runs properly throughout the day. If you begin to experience technical difficulties with your device, please submit a tech ticket by emailing us at support-ticket@riverdale.edu
- Restart your device on a regular basis (every 2 to 3 days)
- Close any additional apps or tabs that are not being used to ensure optimal performance
- Charge your device regularly
- Keep your device in a cool, dry location
Device Troubleshooting
If you begin to experience technical difficulties with your device, please send an email to support-ticket@riverdale.edu.
We will schedule a time to assist you in troubleshooting your device via telephone or Google Meet.
- If it is deemed appropriate that you would benefit from a replacement device the tech department will ask you to complete the following:
- Submit a request to support-ticket@riverdale.edu
- The technology department will contact you to confirm the shipping location and that an individual will be available to sign for said package
- Once your replacement is received, please make sure to check the following:
- The device turns on
- The device connects to the internet
- After confirming both, please return the malfunctioned device using the same shipping box and the pre-paid return label (included in the box). If the replacement fails either of the two instructions above, please contact the tech department by emailing at support-ticket@riverdale.edu
Web filtering & Content
For the safety and security of our students, all devices managed by Riverdale are closely monitored. Content filtering, firewalls and age appropriate restrictions have been enabled for your child’s safety. RCS issued devices use GoGuardian to monitor student technology safe. Families have access to this information through GoGuardian Parent. GoGuardian Parent allows families to access to monitoring the students browsing data and device usage. For more information on how to set up an account with GoGuardian Parent, review our detailed help article.
Apps, add-on’s or extensions
Applications, add-ons or extensions are not downloadable on managed devices. To access educational apps, add-ons or extensions, you must submit a request to the technology department by submitting a request to support-ticket@riverdale.edu
Connecting the device to WiFi
Chromebook
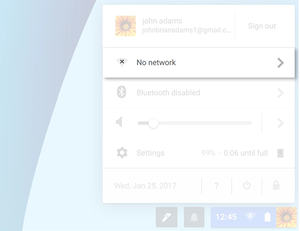
- To connect to a wireless network, select the Status Tray.

- Select No network.

- Scroll through the list and then select your wireless network.
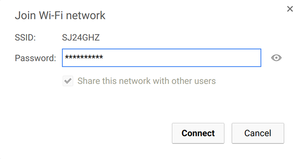
- If your wireless network is secured, enter the password, and then select Connect.

Automatically connect to a network
If you have multiple Wi-Fi networks in your area, you can choose to automatically connect to a specific one:
- Make sure you're connected to a Wi-Fi network.
- At the bottom right, select the time.
- Select Settings.
- In the "Network" section, select Wi-Fi and then your network.
- Turn on Automatically connect to this network.
iPad

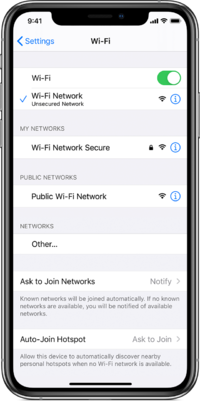
- From your Home screen, go to Settings > Wi-Fi.
- Turn on Wi-Fi. Your device will automatically search for available Wi-Fi networks.
- Tap the name of the Wi-Fi network that you want to join.
- You will see the following options:
- My Networks: Wi-Fi networks that you've connected with before.
- Public Networks: Available Wi-Fi networks that you've never connected with before.
- Secure Networks: Wi-fi networks that are password protected and have a
 by their name. Enter the password and tap join. If you cannot tap join, the password you’ve entered is incorrect.
 - After you join a network, you'll see
 next to the network and
  in the upper-left corner of your display
Still do not see your network? Check out this apple support page for more information