Assess Student Learning Remotely Using SMART Notebook?: Difference between revisions
No edit summary |
|||
| (16 intermediate revisions by the same user not shown) | |||
| Line 1: | Line 1: | ||
{{abox | |||
| name = Assess Student Learning Remotely Using SMART Notebook? | |||
| summary = Create formative assessments using SMART Notebook’s response 2 wizard and convert files from previous versions of SMART Response. | |||
| for_employees = Y | |||
| for_students = N | |||
| for_parents = | |||
| cat1 = Classroom Technology and Systems | |||
| cat2 = | |||
| maintained = MR | |||
| year = 2022-2023 | |||
}} | |||
You can create formative assessments using SMART Notebook, and administer the assessment remotely. | |||
== To create an assessment == | == To create an assessment == | ||
'''Step 1 -''' Click [[File:SMART Response Icon.png|40 px]] in the SMART Notebook toolbar. | '''Step 1 -''' Click [[File:SMART Response Icon.png|40 px]] in the SMART Notebook toolbar. | ||
| Line 33: | Line 45: | ||
The assessment panel opens providing the information students will need to join and complete the assessment from their own devices. | The assessment panel opens providing the information students will need to join and complete the assessment from their own devices. | ||
[[File:Assess2.png| | [[File:Assess2.png|300 px]] | ||
Direct students to hellosmart.com using their mobile device’s browsers. Students will need to enter the assessment’s ID in the Class ID field and then press Next. | '''Step 2 -''' Direct students to hellosmart.com using their mobile device’s browsers. Students will need to enter the assessment’s ID in the Class ID field and then press Next. | ||
[[File:Assess3.png|300 px]] | |||
Students need to enter their name and press Join to connect to the assessment. | '''Step 3 -''' Students need to enter their name and press Join to connect to the assessment. | ||
[[File:Assess4.png|300 px]] | |||
Once the students have joined the assessment, tap Start to begin the assessment. | '''Step 4 -''' Once the students have joined the assessment, tap Start to begin the assessment. | ||
The assessment appears on students’ mobile devices showing the first question and the icon on the assessment page turns blue | The assessment appears on students’ mobile devices showing the first question and the icon on the assessment page turns blue [[File:Assess5.png|30 px]] to indicate it is currently in progress. | ||
Students select their answers to the quiz question and press the arrow key to advance to the next question. | '''Step 5 -''' Students select their answers to the quiz question and press the arrow key to advance to the next question. | ||
When all questions have been answered, students press Submit all Answers and then press it again to confirm their submission. | '''Step 6 -''' When all questions have been answered, students press '''Submit all Answers''' and then press it again to confirm their submission. | ||
==To review results on | ==To allow students to review results on their device== | ||
When the teacher presses review, the student gets instant feedback on the device for each question. Pressing a question on the final review pages takes the user to that question to see what selections are available | '''1.''' When the teacher presses review, the student gets instant feedback on the device for each question. Pressing a question on the final review pages takes the user to that question to see what selections are available. | ||
The percentage correct is indicated at the bottom of the device screen. | '''2.''' The percentage correct is indicated at the bottom of the device screen. | ||
When the review is complete, press Sign Out. A prompt asking the student to confirm leaving the activity opens. | '''3.''' When the review is complete, press Sign Out. A prompt asking the student to confirm leaving the activity opens. | ||
[[File:Assess6.png|300 px]] | |||
Tap Leave Activity. The activity closes and the student is returned to the initial hellosmart.com website. | |||
Latest revision as of 12:00, 30 June 2022
| Create formative assessments using SMART Notebook’s response 2 wizard and convert files from previous versions of SMART Response. | |
| Intended for Employees and Students | |
| Categorized under Classroom Technology and Systems | |
| Maintained by Matt Ringh | |
| Up-to-date for the 2022-2023 school year. |
You can create formative assessments using SMART Notebook, and administer the assessment remotely.
To create an assessment
Step 1 - Click ![]() in the SMART Notebook toolbar.
The Response assessment Add Content dialog box opens.
in the SMART Notebook toolbar.
The Response assessment Add Content dialog box opens.
Step 2 - Select the question type for the first question. You can choose multiple choice, true or false, multiple answer, poll/opinion or short answer. NOTE: The question type determines the answer format. For example, a multiple-choice quiz gives four potential answers from A through D, while a true or false quiz will give only True and False answers for students to select.
Step 3 - Enter a question and its answers. You can use up to 150 characters.
NOTE: Each question requires at least two answers.
TIP: To add an image, tap the Add Image icon.
Step 4 - Select the correct answer for the question you just added.
Step 5 - Use the Add Question button to continue adding questions. Above the Enter a question text box, you can change the question type for each question that you add. To go back and edit questions, use the Previous button.
Step 6 - When you’re done adding questions, click Next. The Review Content dialog box opens. Here you can add a quiz title and instructions.
TIP: Click Save to save your question set so you can reuse it in other lessons or activities.
STEP 7 - Click Finish. The assessment loads and then appears on a new lesson page.
Using a student device to complete an assessment
Once the assessment is running, it can be accessed on any student device.
Here's how to use a student device to complete an assessment:
Step 1 - From the assessment page, tap the assessment icon ![]() .
.
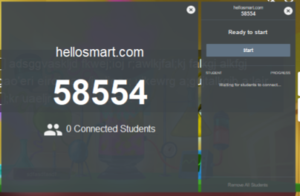
The assessment panel opens providing the information students will need to join and complete the assessment from their own devices.
Step 2 - Direct students to hellosmart.com using their mobile device’s browsers. Students will need to enter the assessment’s ID in the Class ID field and then press Next.
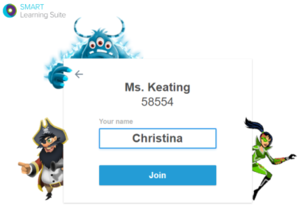
Step 3 - Students need to enter their name and press Join to connect to the assessment.
Step 4 - Once the students have joined the assessment, tap Start to begin the assessment.
The assessment appears on students’ mobile devices showing the first question and the icon on the assessment page turns blue ![]() to indicate it is currently in progress.
to indicate it is currently in progress.
Step 5 - Students select their answers to the quiz question and press the arrow key to advance to the next question.
Step 6 - When all questions have been answered, students press Submit all Answers and then press it again to confirm their submission.
To allow students to review results on their device
1. When the teacher presses review, the student gets instant feedback on the device for each question. Pressing a question on the final review pages takes the user to that question to see what selections are available.
2. The percentage correct is indicated at the bottom of the device screen.
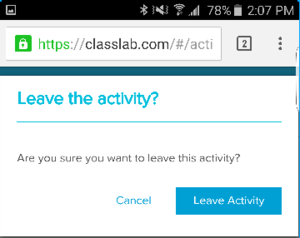
3. When the review is complete, press Sign Out. A prompt asking the student to confirm leaving the activity opens.
Tap Leave Activity. The activity closes and the student is returned to the initial hellosmart.com website.


