Access SMART Notebook on iPadOS: Difference between revisions
No edit summary |
No edit summary |
||
| Line 11: | Line 11: | ||
[[File:2 Done.jpg|350px|alt=|left]] <br clear="all"> | [[File:2 Done.jpg|350px|alt=|left]] <br clear="all"> | ||
'''Step 5 -''' Click the Add-on tab (bottom of Notebooks side tabs. | '''Step 5 -''' Click the Add-on tab (bottom of Notebooks side tabs). | ||
[[File:3OpenAddOns.jpg|350px|alt=|left]] <br clear="all"> | [[File:3OpenAddOns.jpg|350px|alt=|left]] <br clear="all"> | ||
'''Step 6 -''' | '''Step 6 -''' Click on "SMART Maestro". | ||
[[File:4-MaestroOpen.jpg|350px|alt=|left]] <br clear="all"> | [[File:4-MaestroOpen.jpg|350px|alt=|left]] <br clear="all"> | ||
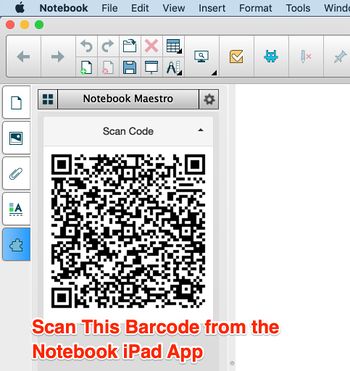
'''Step 7 -''' - You may be prompted to restart Notebook at this time. Once restarted, repeat steps 5 & 6, and you will see a scannable code. | |||
[[File:5 Scan Notebook.jpg|350px|alt=|left]] <br clear="all"> | [[File:5 Scan Notebook.jpg|350px|alt=|left]] <br clear="all"> | ||
'''Step 8 -''' - Open the Notebook app on your iPad. | |||
Revision as of 12:18, 9 March 2020
Step 1 - Navigate to the SMART Maestro Home Page
Step 2 - Scroll down and click "Download Maestro".
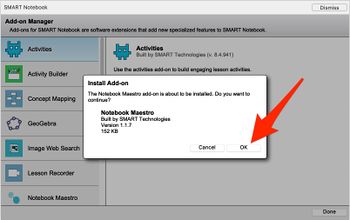
Step 3 - Open the Downloaded file (which will open in SMART Notebook), and click "OK".
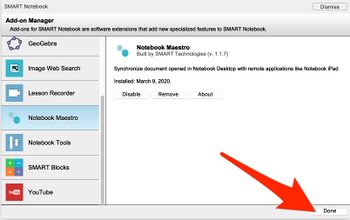
Step 4 - Once the new page loads, click "Done".
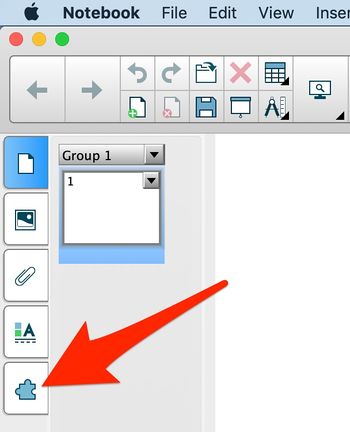
Step 5 - Click the Add-on tab (bottom of Notebooks side tabs).
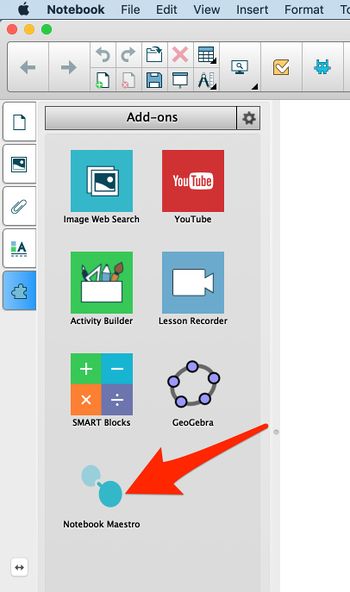
Step 6 - Click on "SMART Maestro".
Step 7 - - You may be prompted to restart Notebook at this time. Once restarted, repeat steps 5 & 6, and you will see a scannable code.
Step 8 - - Open the Notebook app on your iPad.

